It seems that the kitties were not getting any love around here lately so I decided to use some of my scrap receiving blanket stash to make them a toy. I thought about making a simple ball, but then found this great rat toy template from Martha Stewart. The pattern is for a felt rat that is hot glued together. My cats would destroy that in minutes, so I opted to sew it, put some felt ears on it, fill it with catnip and fiberfill, and put a rope tail on it.
This is my first tutorial so please provide feedback and ask questions. I do recommend if you make this, make sure the kitties are not in the sewing room because they could not wait for it to be finished.
You can make this from scrap - I used a small rectangle of receiving blanket and about an inch square of felt for the ears. You also need a 3 inch piece of rope for the tail, a tablespoon of catnip, and two big handfuls of polyfil. Pattern pieces cut out - then I realized I have two of the same side so I cut a reverse of the rat side shape.
Cut a slit halfway into the ear, then fold over about 1/4". I then sewed a V shape into the ear so it would stick up a little bit.
Place right sides together of the two rat sides and sew with about 1/4" seam allowance - I did 1/8" so the rat would be bigger.
Turn the two sides right sides out, then mark two eyes and a nose with either chalk or a water soluble marker. I used the button hole foot (accidentally) but it worked really well. I did a very tight zig zag stitch for the eyes and the nose. This rat has no mouth, but you could add one - I just couldn't picture the rat's expression since I knew this was going to be a toy to torment kitties.
Turn inside out and sew the bottom on and leave about 2" at the base of the tail for turning and for stuffing.
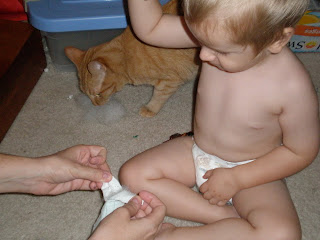
Turn the mouse right side out, fill the nose with at least 1 Tbls of cat nip, then stuff with a washable polyfill. As you can see, the one kitty was ready for this to be done right away. They love catnip. My son had a great time stuffing the toy.

More stuffing - we used a chopstick to press it into the edges and get the mouse into shape. Stuff it loosely, not too full.
Once you finish stuffing, take a piece of rope about 3 inches long, insert into the opening. Tie a knot into the end of the rope. (Don't worry about the end past the knot fraying. Any products to prevent fraying would be toxic to the kitty.) Pin the rope into place so it does not move while you reinforce your seams. Fold the ends by the tail in and edge stitch around the rat on all sides. Reinforce the tail - sew straight over it a few times - this will be tugged on so you do not want to rat falling apart at the tail after you reinforced all those seams.
Final rat - cute little thing.
First examination of the toy... and to see who would win first chance at the kill...
And once it was caught... I am really glad I reinforced the tail because he started pulling on it with his teeth and pushing on the body - he was determined to pull the thing apart but it has held up for hours of play!


No comments:
Post a Comment